Help center · Tutorial · 7 steps
How to plan a research project schedule: milestones, checklists, the timeline, baselines, and no-cost extensions
- About 15 minutes
- Free plan and up (timeline editing and dependencies on Pro)
- Checked in the app on
To plan a research project schedule on Helikon, add the milestones on the project's Milestones tab, give each one a due date and an accountable person, and break the larger ones into checklists. Then set a baseline, so the timeline shows how the plan moves from there. Every plan, Free included, gets unlimited milestones, repeats, watchers, checklists, baselines, no-cost extensions, and a read-only timeline. On Pro, the timeline also draws start-date bars, lets you drag to reschedule, links milestones that wait on each other, and overlays the baseline.
The project owner's plan decides what the project gets. A collaborator on Free has the Pro timeline on a Pro owner's project, and a Pro member on a Free owner's project doesn't.
Before you start: you need a project. If you created it from a template, such as Sponsored Research (Industry), its milestones are already on the tab (see Set up an industry-sponsored project). Anyone on the project except a viewer can add and change milestones. Setting a baseline and recording a no-cost extension are for the project owner and admins.
Step 1Add the milestones and who's accountable for each
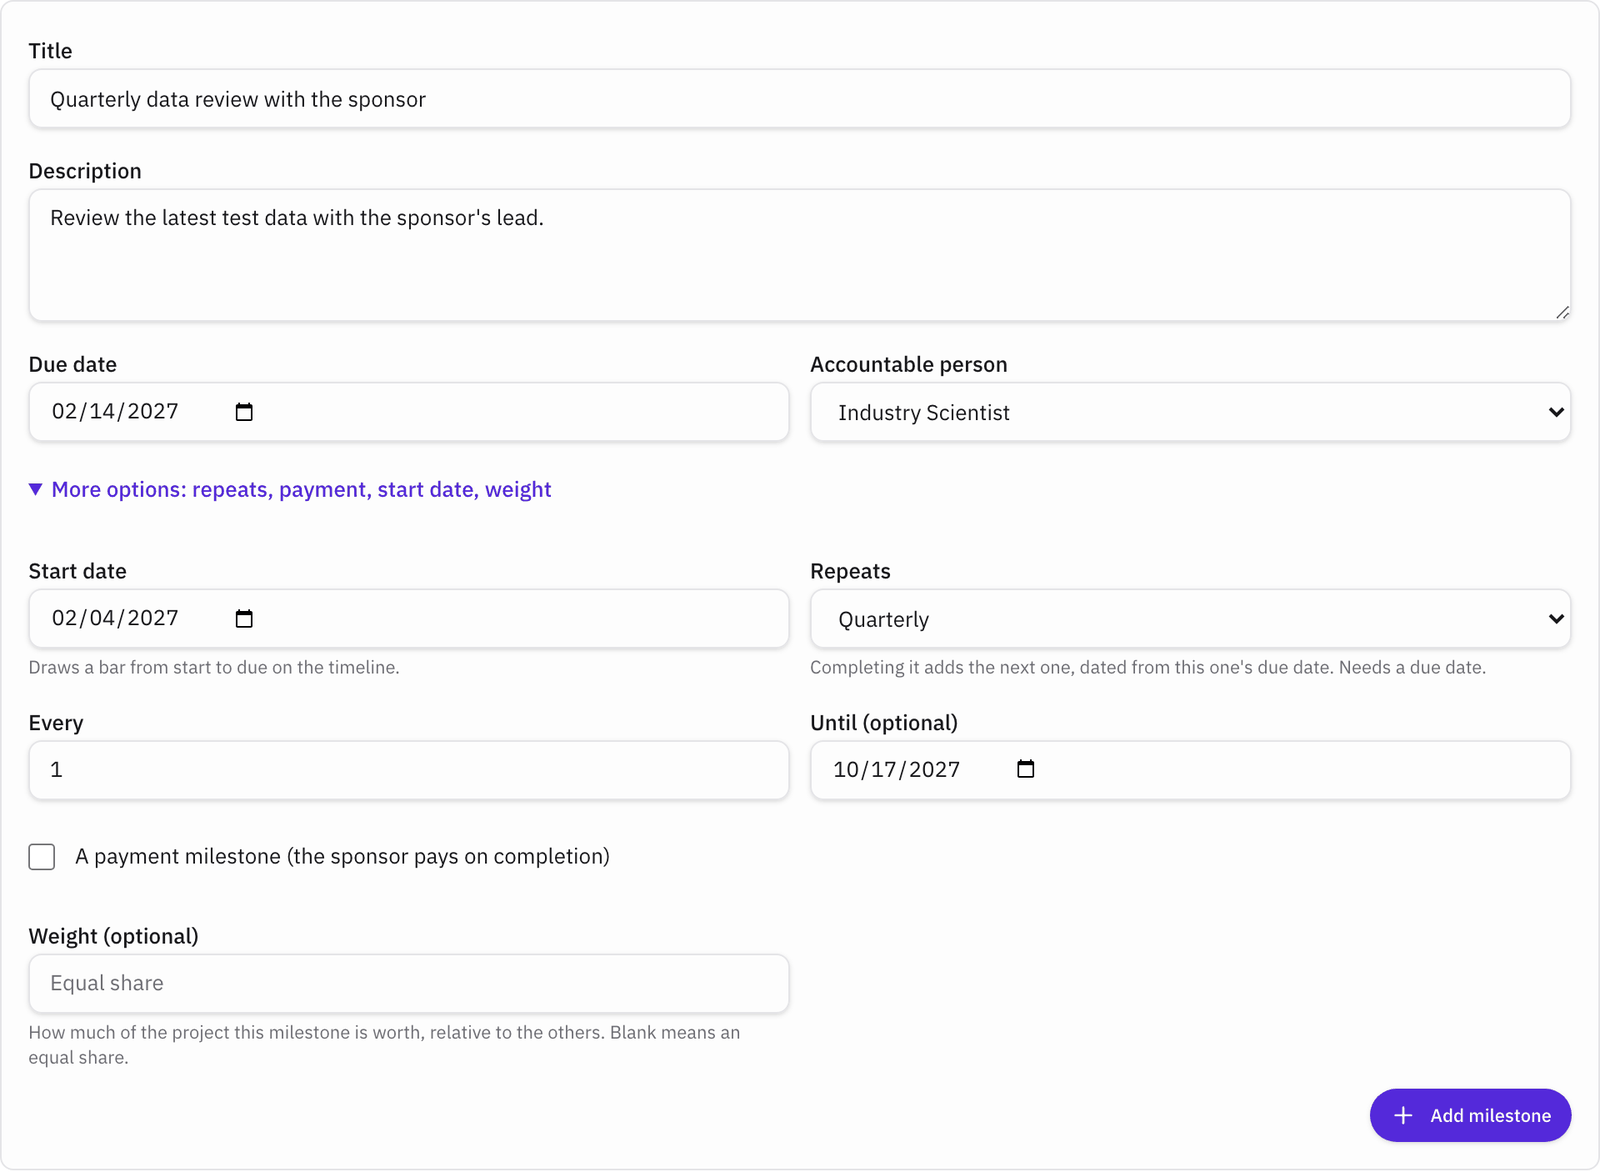
Open the project's Milestones tab. The timeline is at the top, with the Baseline panel below it. Under them, the form for a new milestone takes a Title, a Description (useful for what counts as done), a Due date, and an Accountable person from the project's members. Click Add milestone. There's no limit on how many a project holds, on any plan.
Each milestone has one accountable person, and anyone else who wants its reminders can watch it (step 3). Set a milestone's status from the ⋯ menu on its row: Not started, In progress, At risk, Delayed, Blocked, On hold, Completed, or Canceled. A milestone past its due date shows a flag such as Overdue by 3d until it's completed or canceled.
Edit details in the same menu changes anything you entered. On a completed milestone, it also has a Completed on date, for a milestone you mark done after the day it was really finished.
Step 2Make a milestone repeat, or mark it as a payment
Open More options on the form, or Edit details on a milestone that already exists.
- Repeats: choose Weekly, Monthly, Quarterly, or Yearly, then Every (1 to 99) and, if you like, Until. A repeating milestone needs a due date. When you complete it, the next one is added, due one interval after this one's due date, with the same accountable person, watchers, and payment. Canceling one continues the series too. To end it, choose Cancel and stop repeating from its menu.
- A payment milestone (the sponsor pays on completion): tick it and enter the Payment amount, up to 999,999,999.99. The row shows a Payment badge with the amount, without a currency symbol, and the timeline draws a ring around the milestone.
On Pro, More options also has a Start date, which draws a bar from the start to the due date on the timeline, and a Weight. The weight is how much of the project the milestone is worth relative to the others, and blank means an equal share. It feeds the earned-value figures on Pro's status reports.

Step 3Watch a milestone, and break it into a checklist
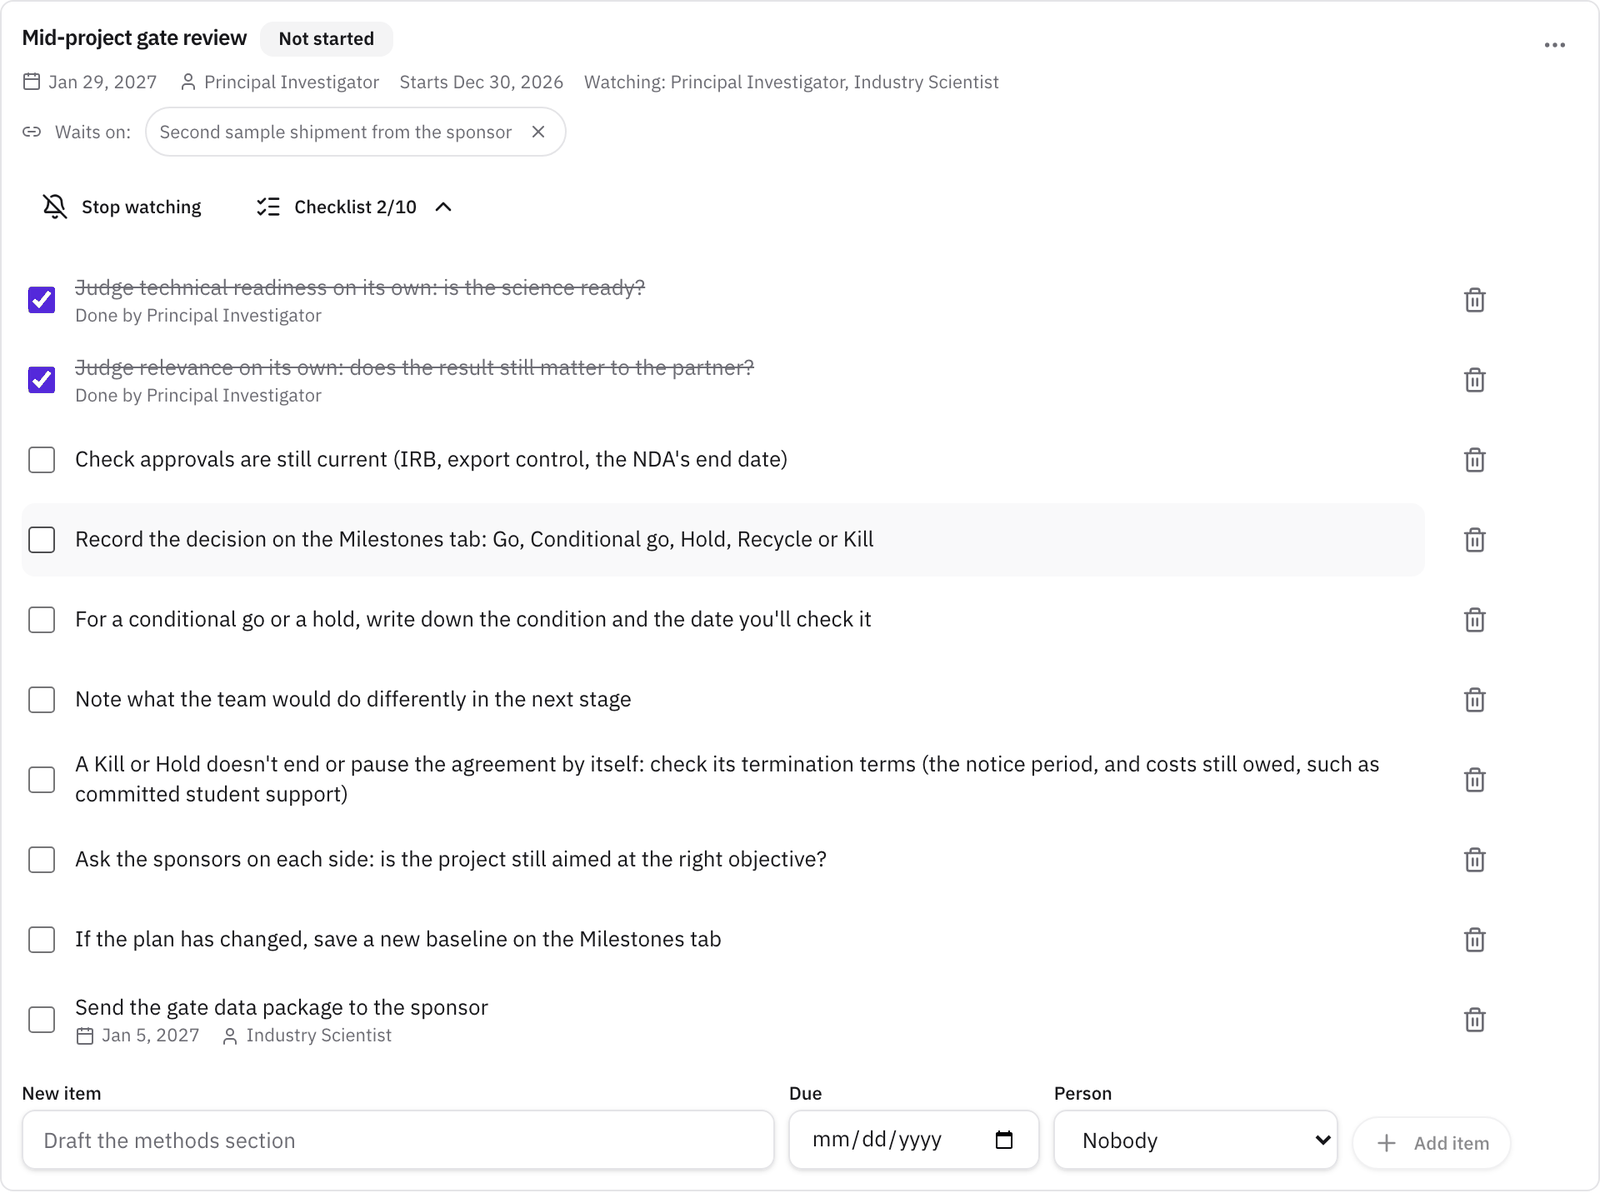
Watch on a milestone's row sends you its reminders without making you accountable for it. Anyone on the project can watch, viewers included, and the row lists everyone who's watching. Stop watching takes you off.
Checklist opens the milestone's items and shows how many are done. To add one, type the New item, set an optional Due date and Person, and click Add item. Tick an item when it's done: the row shows who finished it, and the Activity tab records it. A milestone holds up to 100 items on any plan, and anyone except a viewer can add, tick, and delete them.
Reminders arrive by email with no setup:
- Milestones. The accountable person, the project owner, and everyone watching get an email three days before the due date and another the day before. If the milestone is still open the day after, they get one more.
- Checklist items with a due date. The same three emails go to the item's person and to the milestone's watchers. An item with no person reminds the milestone's accountable person instead, or the project owner if there's none.
Reminders stop once a milestone is completed or canceled, once an item is ticked, and once the project is archived or completed. Anyone can turn them off with Project deadline reminders in Settings, under Notifications.
Step 4Read the timeline
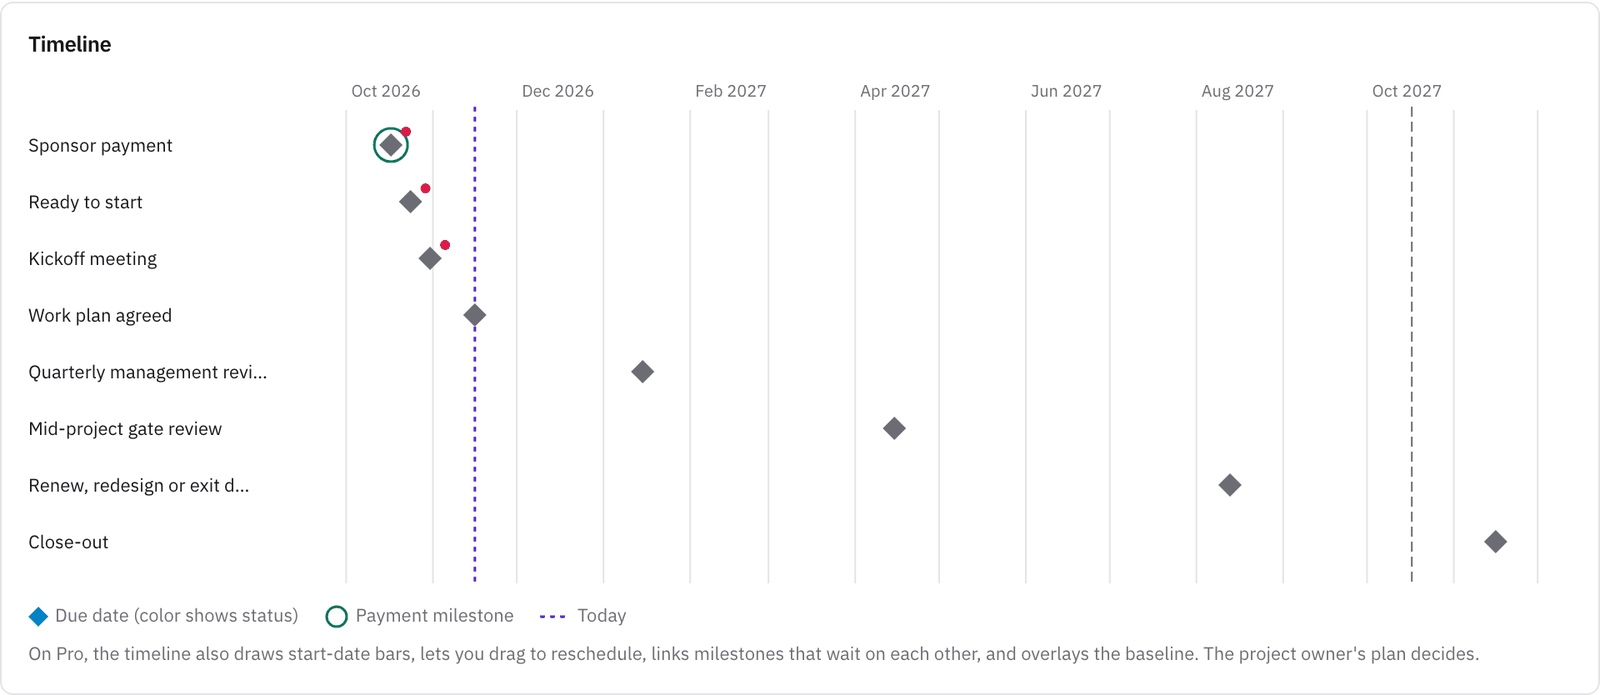
The timeline at the top of the Milestones tab is on every plan. It draws each milestone as a point at its due date, colored by its status, with a ring on payment milestones and a red dot on anything overdue. A dashed line marks today, and another marks the project's end date. Arrows show milestones that wait on others. Once you set a baseline, hollow marks show where each milestone was planned to fall.
The timeline draws the first 40 milestones, and the list below it shows every one. On Free, it's read-only, and a note under it says what Pro adds.
Step 5On Pro, reschedule and link milestones on the timeline
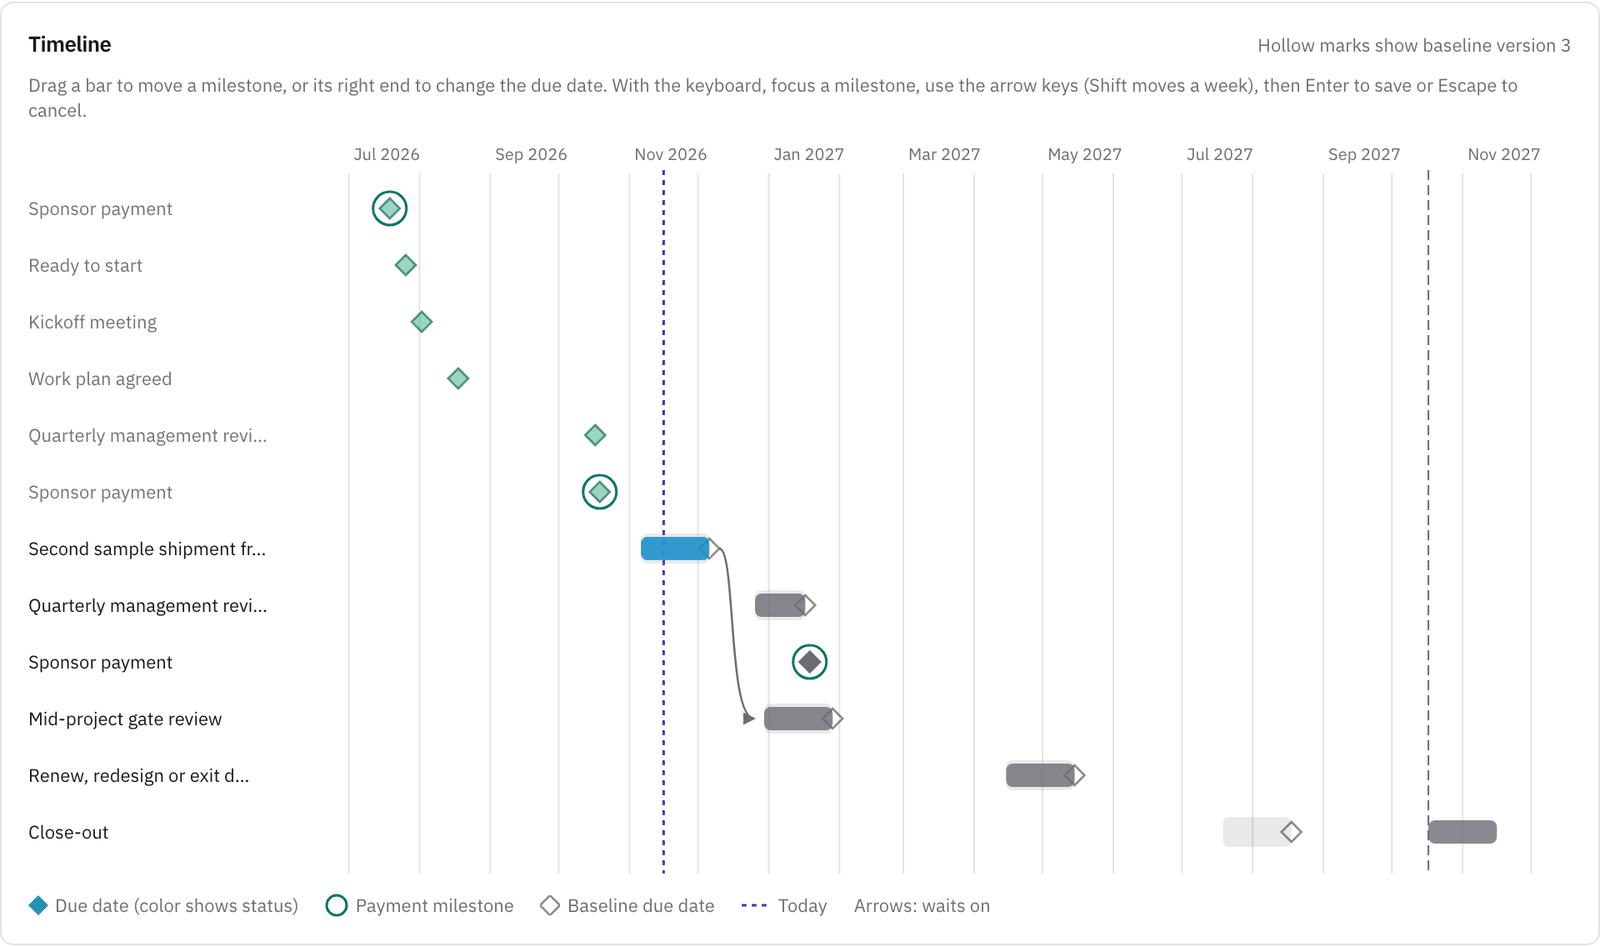
When the project owner is on Pro or higher, the timeline draws a bar from each milestone's start date to its due date, with the baseline's planned span behind it. Anyone on the project except a viewer can then reschedule from the timeline:
- Drag a bar to move both dates, or drag its right end to change only the due date.
- With the keyboard, focus a milestone and move it with the arrow keys (Shift moves a week), then press Enter to save or Escape to cancel.
Each move is saved like any other edit to the milestone, so it's checked and logged the same way.
To link two milestones, choose Waits on… from a milestone's menu and pick the one it waits on. The row then lists it under Waits on, and the timeline draws an arrow between them. The arrow turns red when the milestone is scheduled to start, or fall due, before the one it waits on is due. Helikon refuses a link that would make a loop. Adding a link needs the owner's Pro plan, while removing one, with the × beside it, works on every plan.
Step 6Set a baseline, and re-baseline with a reason
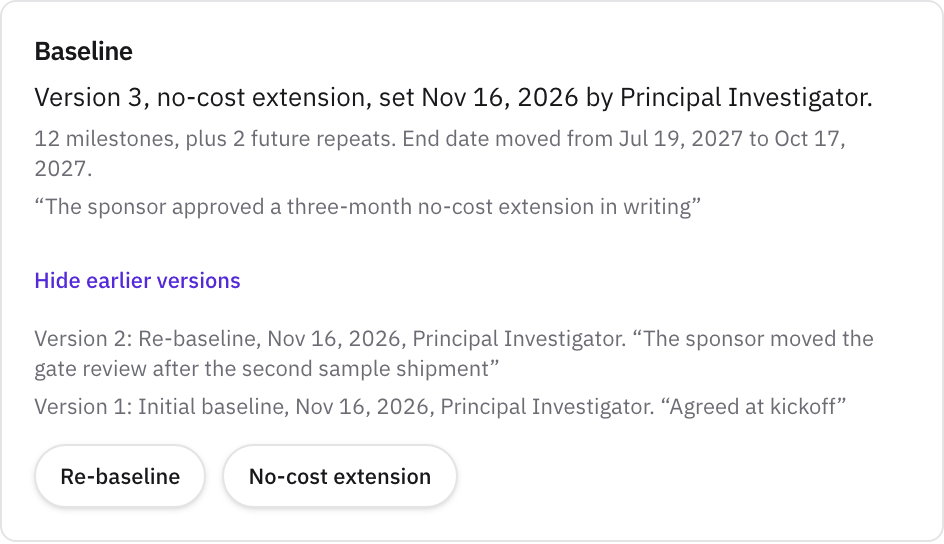
A baseline freezes the plan you'll measure against. In the Baseline panel, the project owner or an admin clicks Set baseline, adds a note if they want one, and saves. It records every milestone's current dates, and repeating milestones count their future occurrences too. The panel then shows the version, who set it and when, and how many milestones it holds.
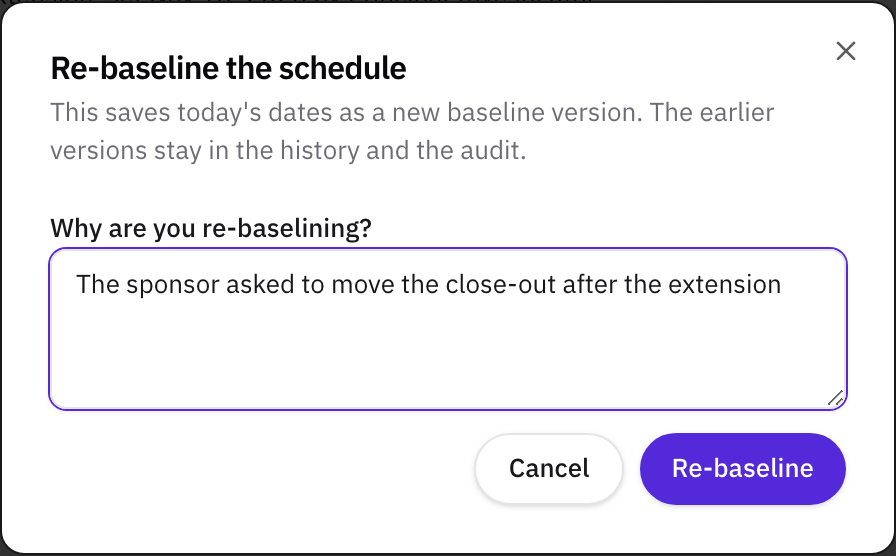
When the plan changes, click Re-baseline. The dialog's Why are you re-baselining? box needs at least 10 characters, such as "The sponsor moved the kickoff by two weeks." Every version stays in the history under Show earlier versions, and each one is logged in the Activity tab as a compliance record. The timeline's hollow marks follow the latest version. Baselines work on every plan.
Step 7Record a no-cost extension
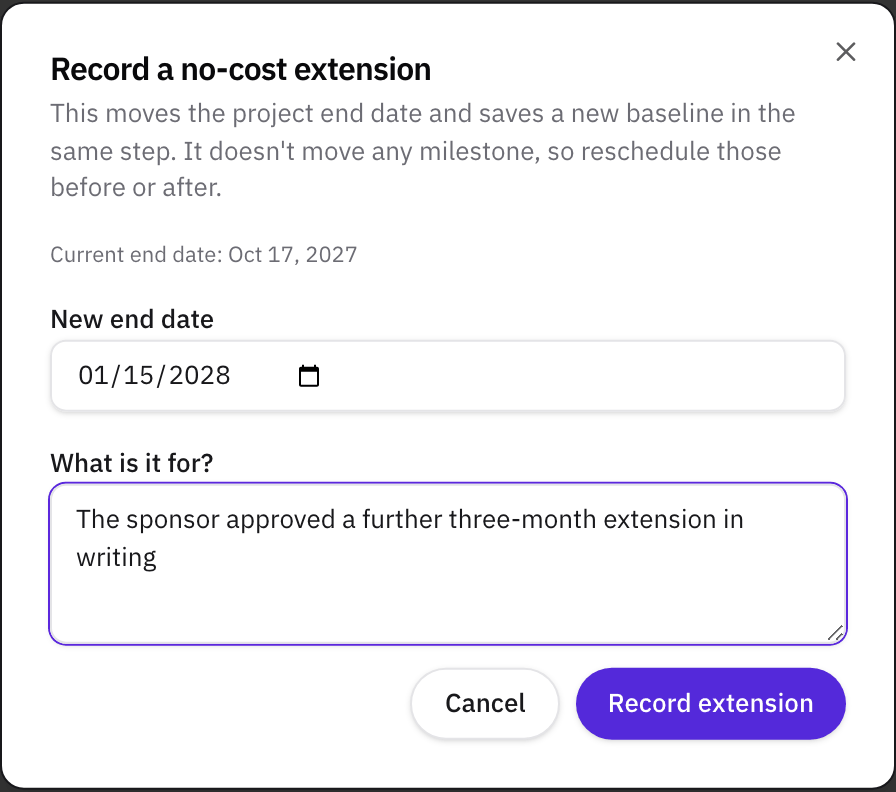
A no-cost extension moves the project's end date without adding funding. In the Baseline panel, click No-cost extension. The dialog shows the current end date. Enter the New end date, which has to be later, and say What is it for?, such as the sponsor's approval and the date of its letter. Click Record extension. Helikon moves the end date and saves a new baseline in the same step, and the panel shows the dates it moved from and to.
The extension doesn't move any milestone or obligation. Reschedule the ones tied to the old end date, such as the close-out and the final report, before you record it. If you move them afterward, re-baseline so the baseline matches the new plan.
Translation Box: "no-cost extension"
On the academic side: more time to finish the work on an award, with no new funding. On a federal grant, the agency's rules decide whether the university can start the extension itself or needs the agency's prior approval.
On the industry side: an amendment that extends the agreement's term without changing the price. Get it signed before the end date, because work done after the agreement ends isn't covered by its terms.
On a federal award, check the agency's rules before you record anything here. Under the Uniform Guidance, a recipient whose award terms allow it may "initiate a one-time extension of the period of performance by up to 12 months" without the agency's prior approval (2 CFR 200.308(g)(2)). It still has to notify the agency in writing, with its justification and the new end date, at least 10 calendar days before the period of performance ends. The same paragraph requires prior approval when the extension needs more federal funds or changes the approved scope.
NIH applies the rule in its Grants Policy Statement (NIH Grants Policy Statement, 8.1.1.3). An NIH recipient "may extend the final budget period of the previously approved project period one time for a period of up to 12 months beyond the original completion date." The recipient tells NIH through the eRA Commons No-Cost Extension feature. Funds left over at the end aren't enough reason on their own, and any further extension needs NIH's prior approval.
What to do next
- Track what the agreement asks for. How to track deliverables and reporting obligations covers the Obligations card and its reminders, and How to track a research project budget covers the Budget tab.
- Agree how the schedule will be run. Our guide How to manage a university-industry research collaboration covers milestones and academic freedom, the meeting cadence, and escalation.
Sources
- Electronic Code of Federal Regulations, 2 CFR 200.308, Revision of budget and program plans, paragraph (g)(2), one-time extensions (up to date as of 23 October 2026). www.ecfr.gov/current/title-2/subtitle-A/chapter-II/part-200/subpart-D/section-200.308
- National Institutes of Health, 2026, NIH Grants Policy Statement (revised March 2026), 8.1.1.3 Extension of Final Budget Period of a Previously Approved Project Period without Additional NIH Funds. grants.nih.gov/grants/policy/nihgps/html5/section_8/8.1.1_nih_standard_terms_of_award.htm
Related
- GuideHow to manage a university-industry research collaboration: the plain guide
- GlossaryMilestone
- GlossaryKickoff meeting
- GlossaryDecision rights
- GlossaryStage-gate
- WalkthroughManage an R&D collaboration project: schedule, obligations, budget, and status reports
- HelpSet up an industry-sponsored project and its contracts
- HelpHow to track deliverables and reporting obligations
- HelpHow to track a research project budget
- ArticleYou signed the research agreement. Now what? How to run the project from day one
- GlossaryAlliance manager
- GlossaryEscalation protocol
- GlossaryPortfolio manager (R&D)